Guide to Contributing#
What makes a “Recipe?”#
Each recipe should:
Be self contained
Include a list of “ingredients” i.e. which parts of the bluesky framework you need and what data you need
Be a markdown document
Be categorised as a tutorial or how-to guide
Tagged
User
Developer
Admin
Manager First, clone this repository.
With HTTPS:
git clone https://github.com/bluesky/bluesky-cookbook
With SSH:
git clone git@github.com:bluesky/bluesky-cookbook
Overview#
Each “recipe” is a directory under docs/tutorials/ or docs/how-to/. It may
contain one or more Markdown (.md) files with a mixture of narrative text and
code. Each recipe directory may also contain supporting data files, scripts,
illustrations, solutions to exercises, etc.
$ tree docs/
docs/
├── conf.py
├── contributing.md
├── index.md
├── tutorials
│   ├── getting-started
│   │   └── hello-bluesky.md
│   ├── flyscanning
│   │   └── basic-demo.md
├── how-to
│   ├── deploy
│   │   └── single-process.md
...
Some of these Markdown files include a header that describes how to convert them into Jupyter notebooks and execute the code in them. This is described in more detail below.
Setup#
We use the pixi package manager to create an environment with dependencies from conda-forge and PyPI. We recommend installing pixi. Then just:
pixi install
But if you have a strong preference for a different package manager, peek
inside pixi.toml to find the list of dependencies and install them however
you wish.
Build#
pixi run build
Note
Later, if the build results get into a broken state, use pixi run clean
to start fresh.
This creates:
Executed notebooks, generated from eligible Markdown files, under
build/juptyer_execute/HTML under
build/html/
Open build/html/index.html in a web browser.
Develop#
pixi run jupyter lab
In the file browser, locate one of the examples under docs/tutorials/ or
docs/how-to/. Double click to open the directory.
Files like docs/tutorial/getting-started/hello-bluesky.md have a YAML header
which enables the documentation build system to convert them to Jupyter
notebooks and execute them:
---
jupytext:
  text_representation:
    extension: .md
    format_name: myst
    format_version: 0.13
    jupytext_version: 1.16.4
kernelspec:
  display_name: Python 3 (ipykernel)
  language: python
  name: python3
---
One option is to simply edit these files in any text editor.
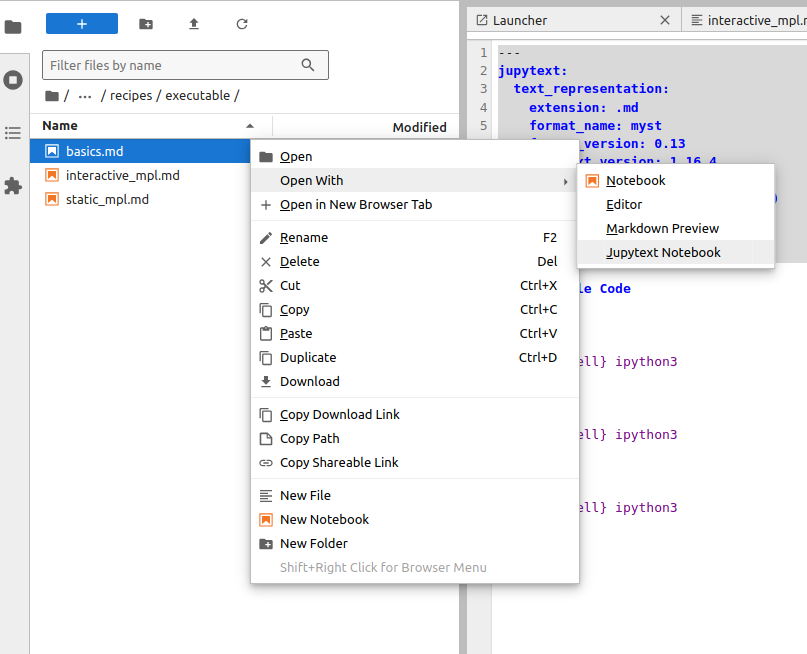
Another is to use Jupyter Lab, which can open these files as notebooks enabling you the interactively edit and execute them, saving the changes to Markdown.
Note that the cell outputs are not saved to disk. This is a feature, not a bug: the outputs are build products, and they do not belong in version control. During the build process, the Markdown document is converted to a Jupyter notebook format and executed.
Test#
The script test.sh runs files with executable code from top to bottom and
prints any unexpected tracebacks.
pixi run ./test.sh docs/tutorials/getting-started/hello-bluesky.md
Note
Sometimes examples are expected to raise an exception. These can be marked up with a “tag” like so. With that tag, the build and test procedures will pass over the exception.
```{code-cell} ipython3
:tags: [raises-exception]

1 / 0
```
To test all examples, run:
pixi run ./test.sh --all
(Above, the script automatically discovers all Markdown files which have that YAML header marking them as executable.)
Deploy#
Once changes are merged to the main branch, the GitHub Actions Publish workflow will:
Publish HTML to this site.
Uploaded the executed ipynb notebooks as a GitHub Artifact (useful for debugging) as an Artifact associated with the workflow run.
Push to the
notebooksbranch of this repository a version where all Markdown Jupytext files have been converted to.ipynbformat, usingpixi run ./convert-all ipynb. This is suitable for use in environments where users need to be handed Jupyter Notebook files directly, such as Google Colab.